Boost Productivity: The Comprehensive Guide to Sending Effective Calendar Invites in Outlook
Boost Productivity: The Comprehensive Guide to Sending Effective Calendar Invites in Outlook
Sending a calendar invite in Outlook is a straightforward process that can be completed with just a few clicks, but doing it effectively requires some knowledge of the platform's features and best practices. This article provides a step-by-step guide on how to send calendar invites in Outlook, along with expert tips to ensure your invitations are clear, efficient, and well-received. By following these guidelines, individuals can streamline their communication, reduce confusion, and save time, ultimately contributing to increased productivity.
One of the key benefits of using Outlook for calendar invites is that it allows users to easily create and share events with colleagues, clients, and friends while keeping everyone on the same page. With just a few mouse clicks, you can create a new event, invite participants, and even include additional details such as locations, times, and descriptions. But before diving into the step-by-step process, let's first look at the reasons why sending calendar invites in Outlook is essential for successful collaboration and communication.
Effective communication and coordination are crucial in today's fast-paced work environment. With Outlook calendar invites, team members and clients can quickly see important deadlines, meetings, and events, reducing misunderstandings and ensuring everyone is working towards the same goals. Outlook's calendar invites also provide a centralized location for all event information, eliminating the need for multiple emails or phone calls.
Understanding the Power of Outlook Calendar Invites
Outlook calendar invites offer several benefits that make them an essential tool for communication and collaboration. Some of these benefits include:
*
Easy scheduling: Outlook allows users to schedule meetings and events directly into the calendar, reducing the likelihood of double-bookings and conflicting schedules.
*
Centralized information: All event details are stored in a single location, making it easy for participants to access and prepare for upcoming events.
*
Reduced communication: By providing a clear and concise invitation, users can reduce the number of follow-up emails and phone calls.
*
Time-saving: Outlook's automation features save time by sending reminders and notifications automatically, ensuring that participants are always on track.
Step-by-Step Guide to Sending a Calendar Invite in Outlook
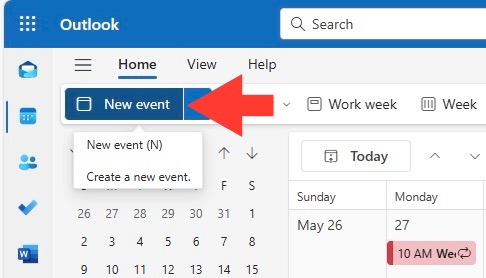
### Step 1: Create a New Event
Begin by creating a new event by clicking on the 'Calendar' icon in the navigation pane and selecting 'New Event.' Alternatively, you can also use the keyboard shortcut Ctrl+N (Windows) or Command+N (Mac).
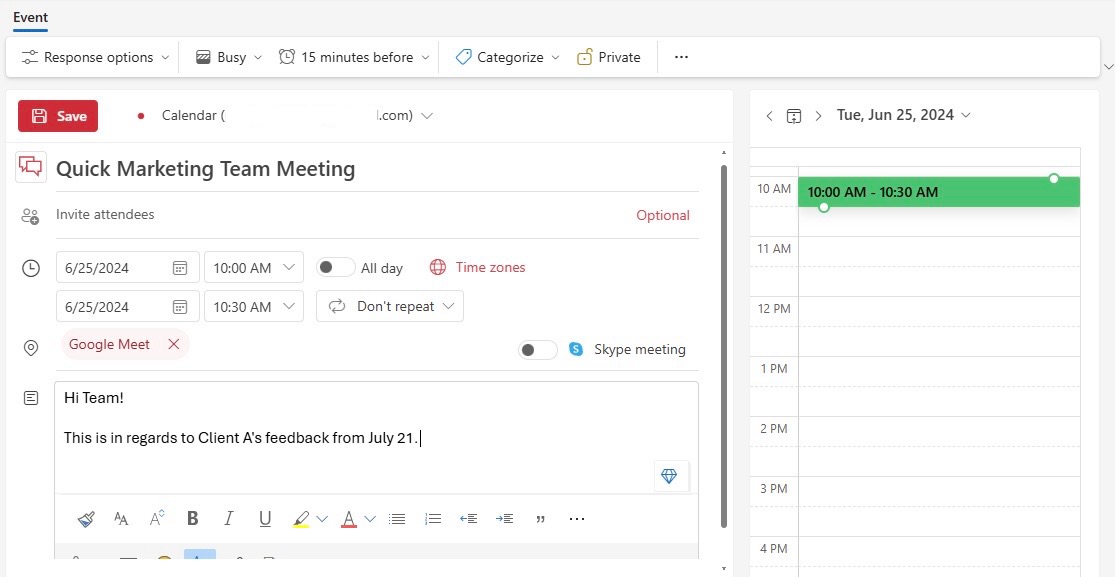
### Step 2: Set Up Event Details
Fill in the event details, including its title, date, start and end times, and any additional descriptions or locations. Make sure to select the correct date and time for the event.
By default, the main organizer of the meeting will receive reminders and notifications. However, the add CSR does allow you to delegate. If someone else should receive reminders, click the ‘Additional Options’ tab and select ‘Send update to attendees’ and then select the amount of reminders and calendar you would like this delegate to receive these updates from.
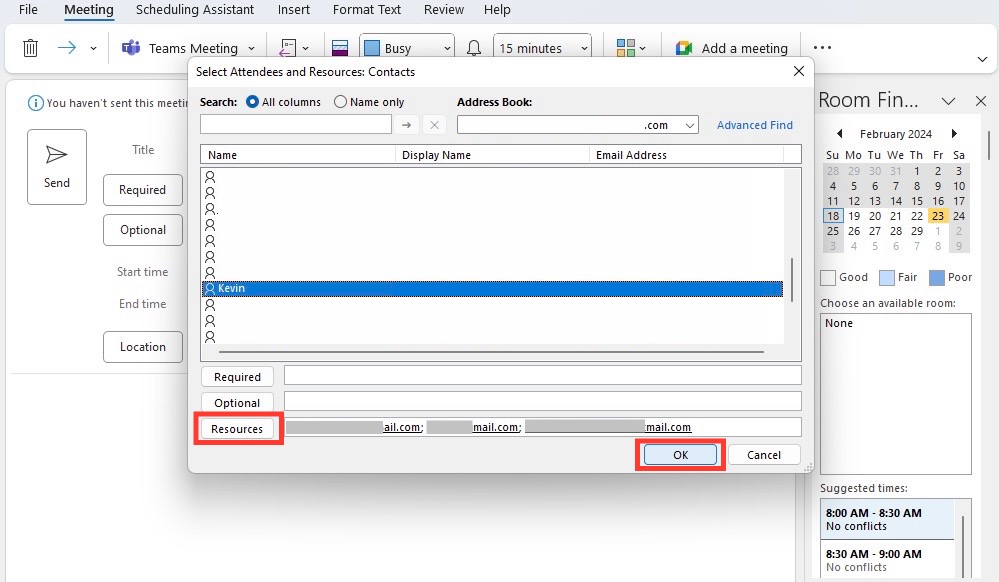
### Step 3: Set Participant Permissions
Determine the level of access each participant should have to the event. You can choose from the following permission levels:
* Can view: The participant can view the event details, but cannot invite others or make changes to the event.
* Can edit: The participant can view and edit event details, including inviting others or making changes.
* Can edit permissions: The participant can view and edit event details, as well as assign permission to other participants.
### Step 4: Send the Invite
Click 'Send' to send the calendar invite to the selected participants. Once the invite is sent, all attendees will receive an automatic update on their Outlook calendar, allowing them to RSVP and add the event to their personal calendars.
Tips for Effective Calendar Invites in Outlook
### Tip 1: Clearly Define Event Details
Make sure to include all necessary details in the event description, including the agenda, location, and any specific instructions. This ensures that all participants have a clear understanding of the event's purpose and expectations.
### Tip 2: Set Realistic Timeframes
When setting the date and time of the event, ensure that it is realistic and feasible for all participants. Leave some buffer time between appointments or meetings to account for unexpected delays.
### Tip 3: Assign Responsible Individuals
Designate a point person to be responsible for the event, including organizing the meeting and sending updates. This reduces confusion and ensures that tasks are completed efficiently.
### Tip 4: Respect Attendee Time
Be mindful of attendees' time, and keep event durations to a reasonable length. Also, include necessary breaks to allow participants to rest and refuel.
Best Practices for Sending Calendars Invites
* Make sure to proofread the event description and details before sending out calendar invites to prevent mistakes and misunderstandings.
* Prioritize event organizer's skills such as their skills within the invite description.
* Make sure the organizer is aware of any specific requirements that the attendees may need.

Related Post

Unpacking the Truth Behind Indiana's Public Employee Salaries: A Comprehensive Analysis

Unlocking Secure Connectivity with Cingular Premier Login: A Step-by-Step Guide

<b>Unveiling The Hidden Life Of Burak Tozkoparan: The Truth About His Marriage</b>

Cremation Services That Keep Your Memory Alive: Personalized Memorial Listings In Texas


